
How to use GameMaker’s filters for lighting!
Got a new lighting system for ProtoDungeon 3. Take a look!
I had a similar effect in 1 and 2:
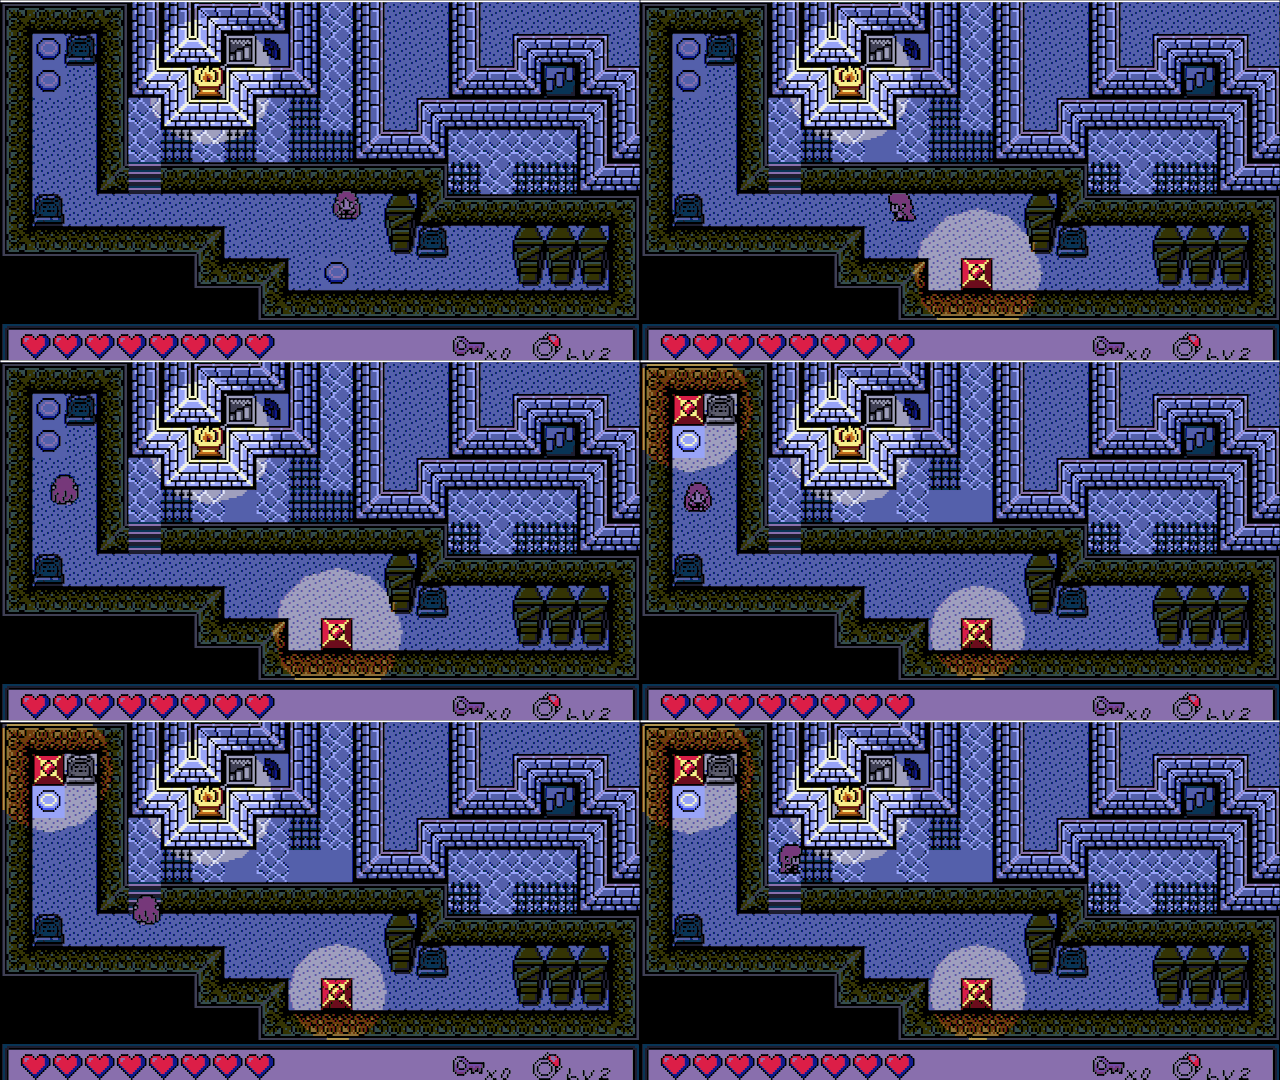
The difference? Now I’m using GameMaker’s new filter system, and it seems to make things run much more performantly. I wanted to share with you how it was done!
First, a little on how the effect works:
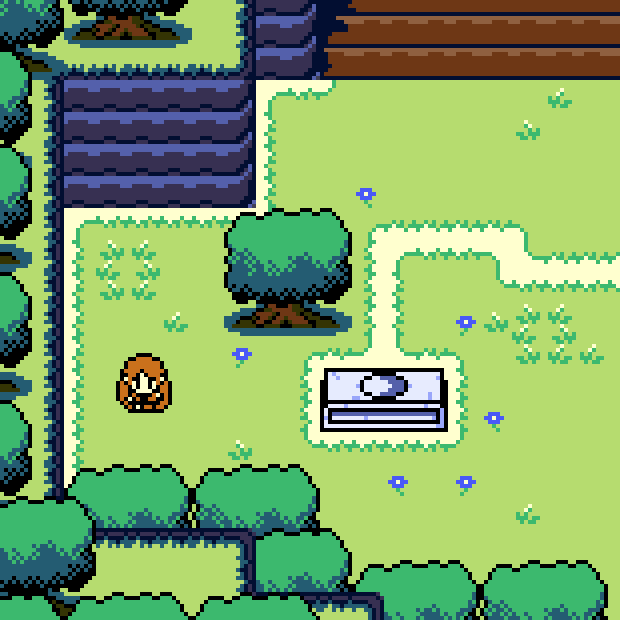
Behold a daytime scene from ProtoDungeon 3!
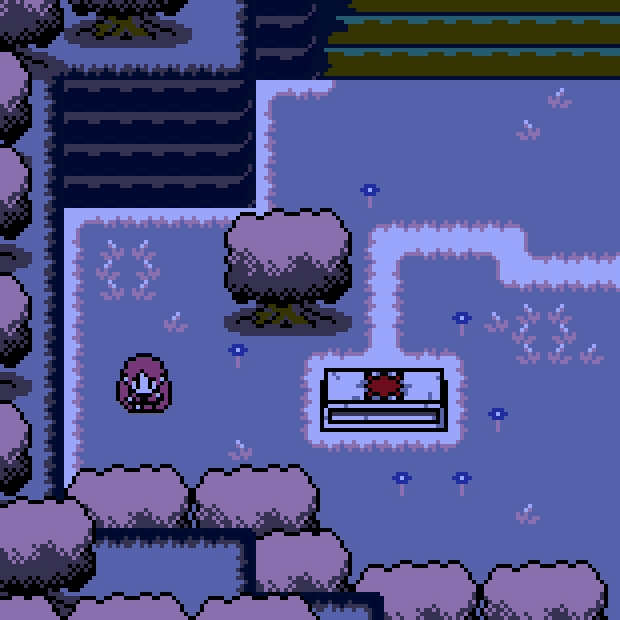
For a cool nighttime effect, instead of just making things darker, let’s employ a Hollywood trick and shift everything blue:
Okay and now the fun part: lighting! For that we just don’t do the blueshift in a particular area (if you’ve tried this before, you know it’s easier said than done)
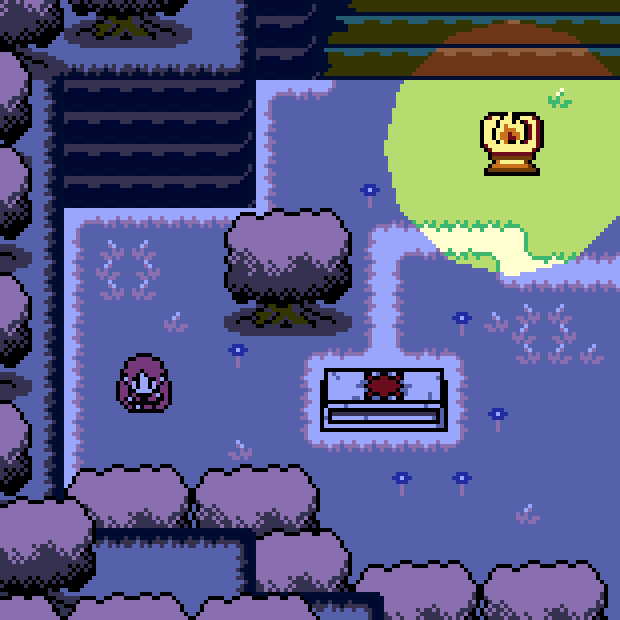
Here’s how it’s done!
Part 1 - The Filter
ProtoDungeon and The Waking Cloak already use palette shifting to represent nighttime thanks to Pixelated Pope’s excellent palette swap shader, (which I still highly recommend for individual layers or sprites!), but there are some limitations when trying to apply a palette swap effect to the entire game, and I kept bumping up against those limitations.
Cue GameMaker’s new filter layers! Filter layers are basically just built-in shaders that apply to everything below them.
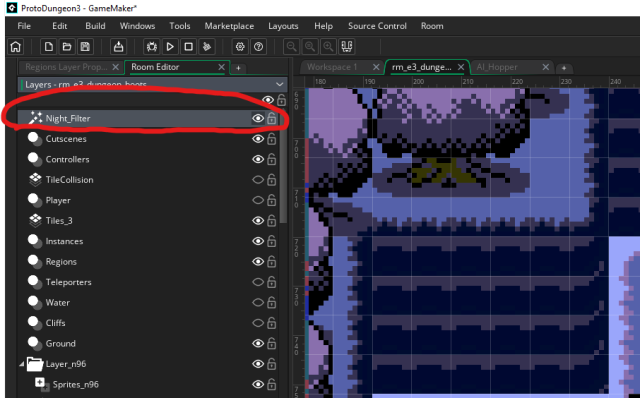
There’s a lot of kinds of filters. Here’s an example of a Contrast/Brightness filter (which I will eventually be using to replace my existing janky shader):
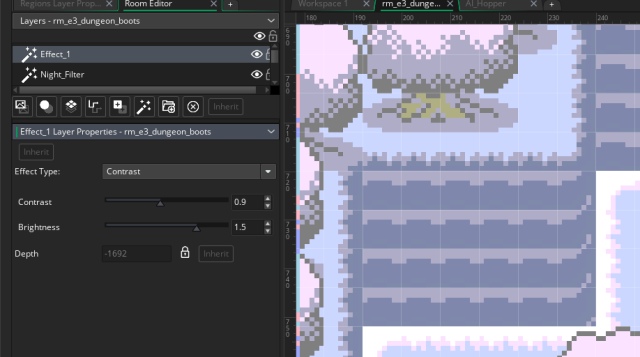
So how did I get Night_Filter working? What I’ve got above isn’t an out-of-the-box filter
I tried a few methods here. Color Balance, Color Filtering, and Colorize all do neat things and are more than capable of making a nice “blueshift” (and I may still use them for tweaks later). However, I wanted to stick strictly to my palette, meaning when I blueshift the daytime colors to nighttime colors, all those nighttime colors are also in my palette. Very recently, the LUT Color Grading filter was added to GameMaker, and this provided a perfect opportunity.
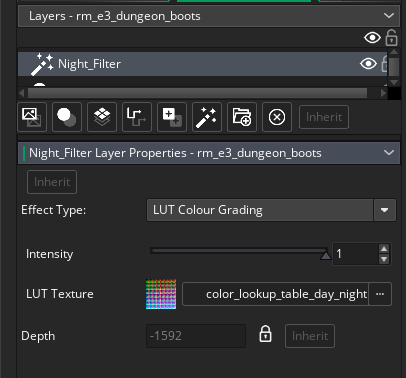
Okay, so what is LUT Color Grading? LUT stands for “lookup table.” You have an image, the LUT Texture, that contains a HECKTON of colors–in this case our table is 512x512 pixels = 262,144 colors. Each color maps via its RGB values to a specific location on the table.
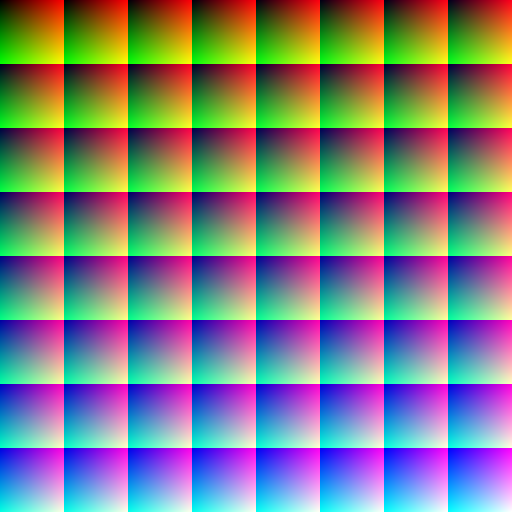
There are a lot more than 262,144 colors (RGB supports 16.7 million), but the filter’s shader handles the “in between” colors too. It looks up the color’s position on the table and changes it to whatever color is actually there. If we used the table above, it wouldn’t actually do anything, because when it looks up the position of each color, it finds… that color. What we need for a palette swap is something more like this:
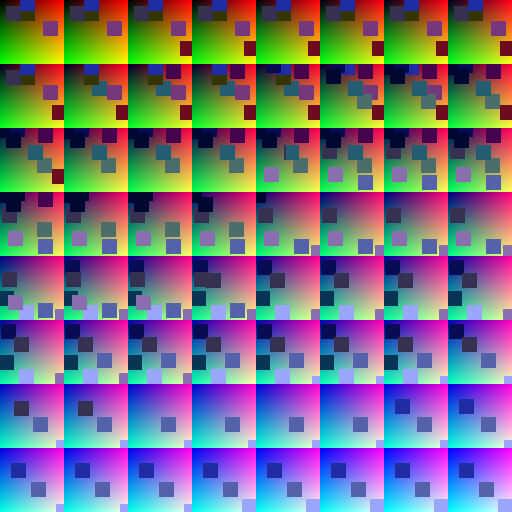
This is what I made by taking the original LUT image (which I found in a secret GameMaker folder), opening it up in Aseprite, selecting the colors I wanted to change, and then doing a color replace at about 30% tolerance:
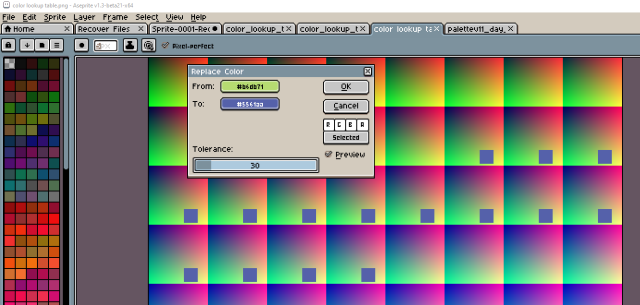
And then did that for all the colors!
You could use any image editor if you wanted to do a simple palette swap this way. (Also, technically, it doesn’t have to be at 30%. It can be much lower, but I found it could be a little finicky for some colors.)
Once you’re done, you add it as a sprite in GameMaker, then select that sprite in the LUT Colour Grading filter, and voila.
Part 2 - The Lighting
Okay, so that works! Now for the lighting! Remember above where I mentioned not doing the blueshift in a particular area?
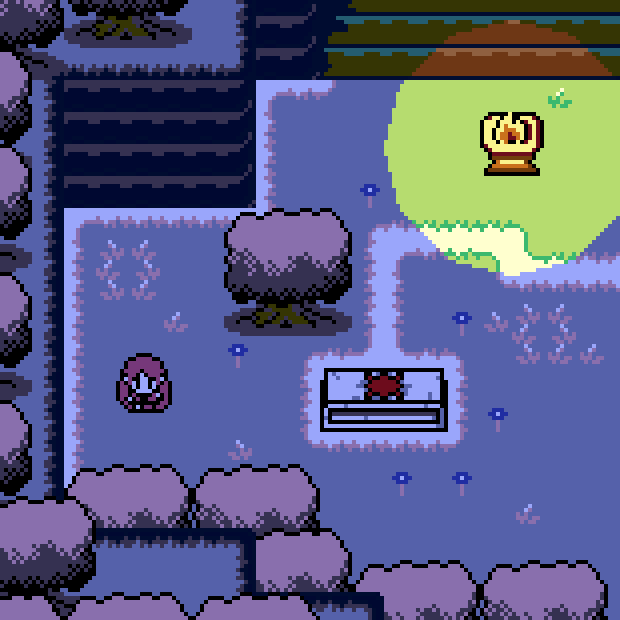
Well, the issue is… you can’t punch holes in layers for the lighting (I tried). I also tried a similar method to what I had before: each light is an almost-invisible, translucent circle that alters the colors just enough to not trigger the palette swap. Unfortunately, with the color lookup table, this was finicky and unreliable.
The answer? Don’t do any of that. Use surfaces instead! (It’s always surfaces, somehow)
So the basic idea: copy the lighted (unfiltered) areas below the LUT Color Grading filter layer to a surface before the filter is applied, then paste that surface after the filter is applied.
I know that sounds wild but bear with me.
We’ll need a few things for this.
2A - Light Objects
Mine are a fair bit more complicated since I have a state machine and all kinds of activation/deactivation code. The main thing we’ll be using for this is pretty simple though: keeping track of a radius and having a position (with x, y position being built in, of course).
I called it obj_light. If you wanted, you could just have the Create event do “radius = 16;” (or whatever number) and just put one of them wherever you want light to show up.
For an extra flicker effect, I use random_range every five frames between radius - 0.5 and radius + 0.5, but I’ll let y’all figure that out.
2B - Light Manager
Next, we’ll create an object to kinda just set stuff up. We’ll call it obj_light_manager. I made it visible and persistent. In its Create event, we’ll create two surfaces, one for lighting and one for masking (I’ll explain that in a bit). Initially, I just made them both the same size as my base resolution (320w, 180h).
global.lightingSurface = surface_create(320, 180);
global.maskLightingSurface = surface_create(320, 180);
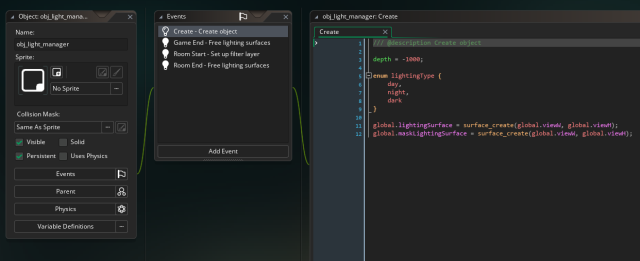
Then we’ll add a few cleanup events (always clean up your surfaces so you don’t have memory leaks). I put this in both Room End and Game End events:
if (surface_exists(global.lightingSurface))
surface_free(global.lightingSurface);
if (surface_exists(global.maskLightingSurface))
surface_free(global.maskLightingSurface);
Now for the magic part: in the Room Start event, we’ll hook into the layer’s events with layer_script_beginand layer_script_end.
var _nightFilterLayerID = layer_get_id(“Night_Filter”);
layer_script_begin(_nightFilterLayerID, lights_surface_create);
layer_script_end(_nightFilterLayerID, lights_surface_draw);
2C - Layer begin/end scripts
Alright let’s make those scripts now, lights_surface_create and lights_surface_draw. I’ll drop these in pastebins with some comments since they’re a bit lengthy and tumblr’s code formatting is nonexistant:
The explanation for how they work is all in there. Basically, we’ll copy the light areas (not filtered yet) to a surface before the night filter takes effect in lights_surface_create, and then in lights_surface_draw we’ll paste them on top of the night filter, and voila, lights!
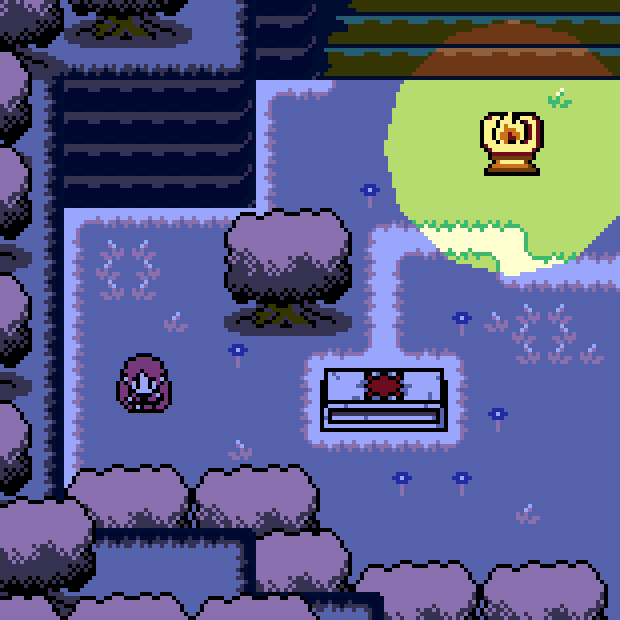
Note: since I’m using subpixels, this method produced non-subpixel lights, which was pretty jarring. In order to make this work with subpixels, I made the lighting surface the base resolution multiplied by the zoom factor, 1280x720 with a 4x default zoom. When I draw the mask surface to the lighting surface, I have to use draw_surface_stretch. Finally, instead of using layer_script_end, I had to draw global.lightingSurface stretched in the Post-Draw event after the application_surface is drawn.
Let me know what you think! Thanks for reading!
- GameMaker
- tutorial
- lighting
- pixel graphics
- ProtoDungeon
- the waking cloak
- game development
- pixel art
- gamedev
- indiedev
- zelda
- surfaces
- shaders
- filters
Also posted on Tumblr.